
New Month Old Post: first posted 1st April 2018.
The practically skilled will mock the mess I made. If I could do it again now, I think I would have the patience to make a decent job of it. At school, I didn’t care enough.

The room smelt of sandpaper, sawdust and lacquer. It housed eight workbenches: the solid wooden kind with shoulders at the sides, tool cupboards underneath and a vice at each corner. And in our tough new carpenters’ aprons: loops around necks, strings tied at the back, deep pockets at the front, we really looked the business.
With that pencil-behind-ear can-do competence that only real woodworkers possess, Tacky Illingworth showed us how to shape a piece of wood into a ship’s hull by pointing the bow and rounding the stern, how to chisel out a couple of recesses in the top to leave a bridge, fo’c’s’le and fore and aft decks, and how to attach dowel masts and a funnel, simpler than but not dissimilar to the model in the picture. Mine was awful: irregular, lob-sided, gouge marks and splinters where it should have been flush-flat smooth. At the end of the year I didn’t bother to take it home. I think we made them only because it involved a variety of tools and techniques, rather than for any functional purpose.
I did learn to love the beautiful, age-old tools though: the tenon saw with its stiffened back, the smoothing plane, the spokeshave, the carpentry square, the brace and bit, the mallet and woodworkers’ chisels, and best of all, the marking gauge.

How could you guess what a marking gauge is for unless you know? Why does it have a sliding block with a locking screw? What are the spikes for? Why two on one side and one on the other, and why are they moveable? A mystery! I’ve got my own now. I last used it to mark how much to plane off the bottom of a door when we got a new carpet.
After spending the following year in Metalwork, we were allowed to choose which to continue. I returned to the relative peace and safety of woodwork, the lesser of the two evils. We had to decide upon a project, so I went for the ubiquitous book rack in its simplest form: a flat base with two vertical ends and a couple of pieces of dowel for feet. I selected a beautiful plank of mahogany which my parents had to buy, and began to cut out what were supposed to be stopped (half-blind) dovetail joints – visible underneath but not at the ends. It was far too ambitious. At the end of the year the book rack laid unfinished on a shelf in Tacky Illingworth’s stock room, wrapped in a soft cloth. His school report flattered me: “Progress is slow but does work of good quality”. Perhaps I had not yet made the mess it eventually became.
That could have been the end of the story because there were no crafts in subsequent years when ‘O’ levels took priority, but an unexpected change of policy allowed games-averse weaklings to escape to art or crafts instead. Metalwork was no longer on offer. It had been replaced by pottery, which was tempting, but for some bizarre masochistic reason I went for woodwork again. Maybe I refused to be defeated. Tacky Illingworth proudly retrieved my unfinished book rack from his stock room, still in its protective cloth from eighteen months earlier.

I even finished the thing. I wrote the date on the bottom: April 1966. It’s a real mess of course. At one end I broke through the wall of the ‘pin’ part of the dovetail and had to stick it back in, and the joints were so loose that even glue could not hold them together. Tacky reluctantly allowed me to fix it with screws. It has been on my desk for over fifty years.
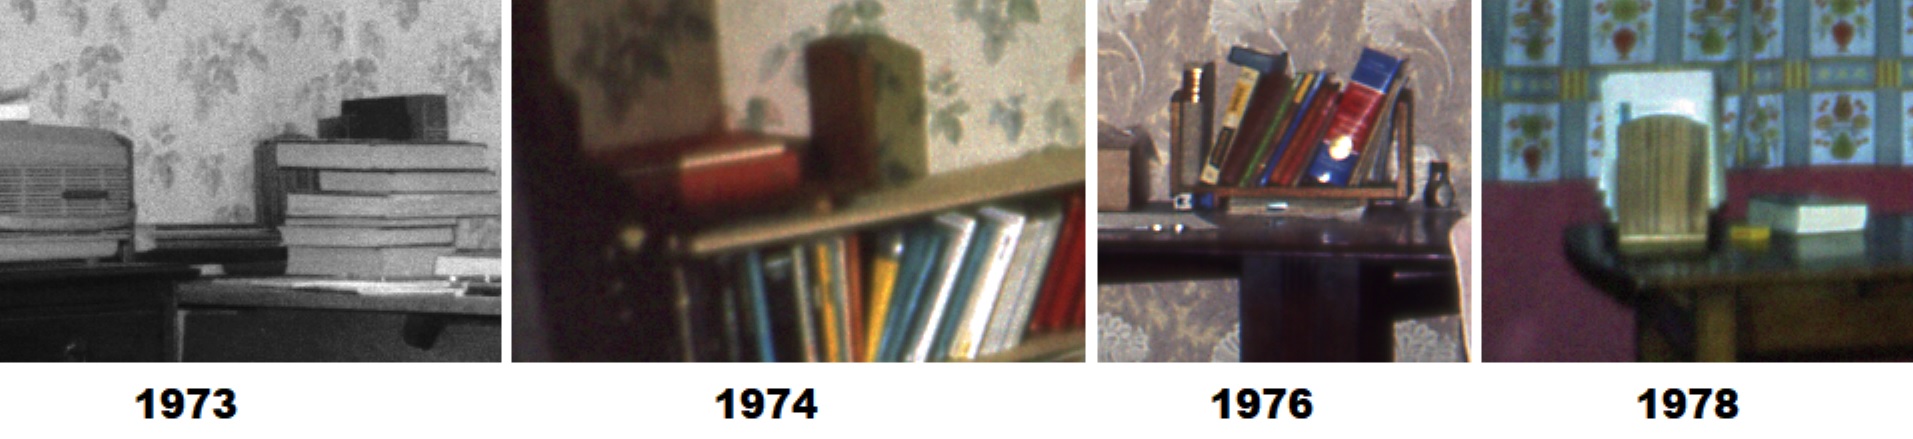
I wondered could I find it hiding in old photographs, and yes, here it is in various Leeds and Hull corners of the nineteen-seventies. It still holds one of the same books.
As I said, if I were to make it again today, in the same way with hand tools not machines, it might not be perfect but I like to think it would be better. That would match my other subjects. At the very least I would hope not to break the ends. It probably comes down to patience, and perhaps a bit of care and confidence as well. As someone once said, education is wasted on the young.


